Shakadoo

Everything to do with your shak.

  • Home
  • About Us
  • Advertise
  • Contact Us
  • Press
  • Privacy Policy
You are here: Home / Archives for How-To

Unstick what’s stuck

by Tamiko Willie Leave a Comment

Inevitably, as you take on home improvement projects, you’ll be challenged with stuck, rusted fasteners. Luckily, there are ways to approach these problems with less frustration and a greater chance of success.

PB Blaster is your greatest friend and ally. Pbcatalyst
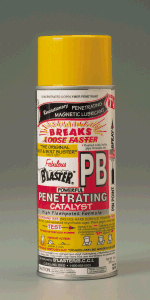
It’s available at most hardware or auto parts stores and leads the pack when compared to similar products. This stuff is for metal fasteners that are screwed into or onto metal. That’s good, because that’s where you’ll have the worst problems.

First, be sure to clean up the portion of the bolt or screw that the tool will engage–you want to maximize your gripping surface any way you can. Take a wire brush to rusty nuts and scrape paint or dirt out of a screw head.

I have 3 simple rules when it comes to stuck fasteners–Juice, heat, and impact. That’s my mantra. Know it. Use it. Live it.

You can’t always use all three, for instance you can’t crank up a propane torch and heat a gas fitting until it glows; you’ll blow yourself up and your fitting will still be stuck. Also, I’d rather not see you spray PB Blaster all over your beautiful wood door, but sometimes you’ve gotta do what you’ve gotta do.

Back to the mantra. Juice means, to soak the junction with penetrant and let it soak in for a few minutes. Heat means, to get the problem area as warm as you can, without causing any fires, explosions, or critical damage to your flippers or other valuables. It’s best to warm up the female side of the connection, so it expands away from the threads. Impact means, don’t use a torquing motion (turning motion) to try to loosen a bolt, but rather hit your tool in the correct direction to unscrew it, either with your palm or a hammer. It also helps to tap a bolt head square on the top several times with a hammer or tap a screwdriver into the slot with the hammer.

All of these steps help break up corrosion on the threads, without twisting the head off of the screw; the juice gets in between the 2 parts, the heat causes expansion and contraction which also loosens the corrosion, and the impact physically breaks the corrosion apart.

It may take several tries, but with practice, you’ll find that problem fasteners aren’t such a problem anymore.
+1
Tweet
Share
Share
Pin
Shares 0

Bamboo flooring; beautiful and renewable

by Tamiko Willie Leave a Comment

Bamboo floors are becoming all the rage and to tell the truth, I’m right in there with the rest of the fanatics. This might just be our next big home improvement project.

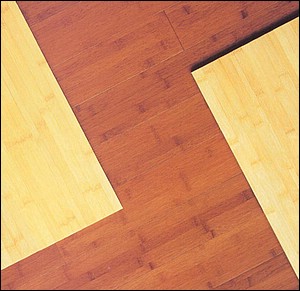
It’s gorgeous, durable, and can be much less expensive than traditional hardwood floors. Plus, it’s cheaper than those hideous composite floor systems. Lots of different colors, patterns, finishes, and installation methods are available–virtually anything you might want or need.Bamboo

With prices as low as $2.00 a square foot on Ebay, bamboo’s popularity is growing nearly as fast as the quickly renewed resource grows in the real world. You can install it as a floating floor, nailed down, or glued as your situation demands, and it’s available in colors that run the gamut from the lightest blonde to a striking black.

Solid bamboo flooring is durable enough to be sanded and refinished 3 or 4 times. It’s a bit harder than White Oak and slightly softer than Maple, but grows to maturity in 6 years, compared to 20-30 years for traditional hardwoods; so it’s a much Greener option.

As long as we’re doing something beautiful for our home, why not have it be eco-friendly and inexpensive as well? Sometimes, you can have your cake and eat it, too.

+1
Tweet
Share
Share
Pin
Shares 0

Power me up!

by Tamiko Willie Leave a Comment

It’s spring, and many of us haven’t even seen the lawnmower since it was buried under the kids’ yard toys last October. In most of the country, the grass is growing again and probably needs mowing. You can make this year’s landscape maintenance safer, easier, and help your tools last longer with some simple preventative maintenance.

The lawnmower could definitely use an oil change; it’s easy to do yourself. First, drain the gas and remove the spark plug wire to prevent accidental starts and/or loss of body parts. There’s a bolt under the housing that faces up, if you remove it you’ll find that oil comes out. Drain the oil into an appropriate container to be recycled. Clean the bolt and the area that it seats on and then re-install the bolt, tightening firmly.

Now, tip the mower back on its wheels and locate the oil fill. This is usually a plastic plug that unscrews. Fill to the proper level with the oil type and viscosity recommended by the manufacturer. Check in your owner’s manual or go online to the manufacturer’s website to determine the proper fill level for your model. While the mower’s already being worked on, it may very well enjoy having its blade sharpened. You can do this yourself also, or take the blade to a lawnmower or small engine repair shop to have it professionally sharpened.

To remove the blade, turn your mower over after you’ve drained the gas and disconnected the spark plug wire. Once again, it’s important to disconnect the spark plug or you’re liable to wind up with missing parts you’d rather not be parted with. Take a block of wood and wedge the blade against the housing to prevent it from turning. Remove the bolt in the center of the blade to release the blade. Clamp it in a vise and file each cutting surface the same number of strokes. This helps keep your blade in balance. You can reinstall the blade now.

Your mower will love you; especially if you round up those yard toys before the first lawn mowing of the season. Maybe the toys could use a new shed— yet another fun Home Improvement project to add to your list.

+1
Tweet
Share
Share
Pin
Shares 0

Four Tips To Enlarge A Room

by Kathy Helbig Leave a Comment

Roommood
I ran across some really helpful tips for making a small room seem bigger on Tips.net.  It is truly amazing what a little color and creativity can do to a room.

1. Replace your current wallpaper with striped wallpaper. It will make your ceiling seem higher.

2. Use the power of color to transform a small room
into a big one. Choose mint green or pale blue wallpaper or paint to
"enlarge" your room. Shades of white and beige also work well.

3. To make a low ceiling seem higher, use tall lamps
that have the shade below the light bulb, sending the light upward.
Your eye will follow so be sure the ceiling is in good repair.

4. Hang a large mirror on a prominent wall to make a small room look bigger.

They also have some great ideas on how to change the mood of a room so check it out and don’t be afraid to experiment. Who knows you may wind up with your own list of what colors and changes create a certain mood in your room.

via Charles and Hudson

+1
Tweet
Share
Share
Pin
Shares 0

Just in time

by Tamiko Willie Leave a Comment

Like most new homeowners, the minute we signed on the dotted line, we immediately became compulsive hardware store junkies. I think it was 6 months before we could admit we had a problem and by the end of that first year we’d begun 12-stepping our way back to reality. That being said, we’ve still got enough odds and ends hanging around to stock our own hardware store. It comes in handy for those spur-of-the-moment home improvement projects. For instance, in this case, all we needed for the mailbox project was, well, a mailbox. While my spouse ran off to buy said mailbox, Acemailbox
I gathered the other parts at home.

I recycled a nice chunk of pressure treated fencepost from the hide-it-the-mother-in-law’s-coming pile; I found half a bag of Quickrete languishing in the garage; and thanks to that little habit we’re recovering from, we’ve got enough nuts, bolts, and other hardware to last us for the next 20 years. 

Next, we harvest the post hole digger from it’s lair in the back yard, grab a 5 gallon bucket and the shovel and take off for the curb with our supplies in hand. We’re on a deadline here.

Looking up and down the street for signs of the dangerous Post Lady, we see that the coast is clear and get straight to work. The soil here is sandy, so we’re able to dig a hole quickly; we only had to go about 2 1/2 feet of the way towards China, so it wasn’t so bad. It only took a couple of minutes to mix up the Quickcrete and water in our bucket. We set the post in the hole we dug, leaving about 2 feet sticking out, and poured the concrete in, taking care to level the post.

A couple of hours later, the concrete is firm enough that we can continue, as long as we’re careful. Prior to sticking it in the ground, we pre-drilled the post for the mounting holes, so the last part was really easy. With a keen ear out for the sound of the Mail Truck of Suffering, we firmly wiggled the old mailbox’s post back and forth a couple of times, until it broke right off at the base.

I unceremoniously tossed the whole assembly in the trash as my spouse slipped the new mailbox over the post. With one of us holding it steady for the benefit of the not-quite dry concrete, we screwed the lag bolts into the 4X4, and BAM! We were done, just like that. And none too soon, either, because it wasn’t 15 minutes before our Post Mistress of Doom showed up. Lucky we dodged that bullet.

This was just about the easiest home improvement project ever, coming in a little longer than an hour.

+1
Tweet
Share
Share
Pin
Shares 0

My mailbox is all emo

by Tamiko Willie Leave a Comment

Often overlooked when home improvement season rolls around is the lowly mailbox, and ours is no exception. We put off doing anything about it for a long time and yes, we’ve had plenty of excuses, just like you, but those days are now officially over. As per the USPS.

The mail has begun to fall out of the rust hole in the bottom, the post is about as strong as a toothpick, the door seldom stays shut, and our Postlady has threatened us with grave bodily harm if we don’t fix it soon–and I fear Postal Workers, as we all should.

Expense is no excuse, since the cheapest mailbox at my local hangout hardware store is $8.00. EIGHT DOLLARS! Browsing their selection, I see some really nice, rust proof plastic models with the stands built right in, for only $40.00-$60.00. Hey, you know, I can afford this!Mailbox for home improvement I’d wager you can, too. Especially if you’re thinking of selling soon; it’s yet another little thing you can do to help boost that  curb appeal, without having to shell out a boatload of money.

horse trailer mailbox for home improvementContinuing my search at home, I realize that this could be an opportunity for self expression. Online I find mailboxes that look like cows, airplanes, barns, doll houses, or even custom painted boxes with Van Gogh sunflowers. They’ve got boxes with hotrod flames, American flags, and of course, the ever popular pin-up girls. I even come across one that’s a miniature horse trailer. It’s amazing to me that anyone would want some of this stuff, but then, we all know weird people. In fact, some of us are weird people.

The time has come to put something better out there, in front of our Shak. Tomorrow, I’ll go get a fairly normal, boring, rust resistant mailbox that we can pound into the ground so the Mail Lady doesn’t have to break out her brass knuckles.

+1
Tweet
Share
Share
Pin
Shares 0

Beer: Not Just For Breakfast Anymore

by badbadivy 1 Comment

Beer_017_3

Growing up, my parents didn’t drink, but my dad kept beer in the refrigerator- he used it as part of a mix he used to fertilize the garden with. I was fairly old before I realized beer was for drinking, not fertilizer. Feel free to tee-hee at me all you want.

Over the years, he has toyed with different recipes to make his grass grow greener, and he has finally come up with his favorite- based heavily on Jerry Baker’s recipe from his book Green Grass Magic, with only minor changes. I finally got dad to share his recipe with me, so I could pass it on to you, lucky Shakyard readers!

You can use this during any season to make your lawn greener, to give your vegetables and other plants a kick, or as a regular fertilizer. If you use this regularly, do it about every 3 weeks.

12 oz. beer- any kind is fine, even Nasty Light. Just whatever you happen to have.
8 oz. ammonia
6 oz. liquid dish soap (Make sure it doesn’t have any degreasers and is not anti-bacterial. Just a cheap-o brand is best)
6 oz. liquid lawn food
6 oz clear corn syrup (like Karo Syrup)

Mix these in a bucket and pour it into a hose end sprayer, and spray away!

Why does this work? The beer acts as an enzyme activator, and the ammonia is an easily digestible form of nitrogen. The soap cleans the grass and softens the soil, and the corn syrup helps it all stick.  Happy fertilizing!

+1
Tweet
Share
Share
Pin
Shares 0

DIY Signature 2.0 Console

by Sarah C. Leave a Comment

Is_sig22I’ve loved this Signature 2.0 Console since I saw it on the cover of Domino’s Green issue. At $1,800, it wasn’t exactly fitting into my budget.

Now It’s Knot Wood has posted a DIY end-table take on Signature’s design from Curbly. They used Ikea’s Lack table and woodgrain contact paper. What a brilliant idea!Stp60510_large

+1
Tweet
Share
Share
Pin
Shares 0

Installing Window Shades or Blinds: Mission Possible!

by Marjorie Dorfman Leave a Comment

Blinds
Windows and how they are covered (treated) can make or break the appearance of any room in your home. They not only render light, but also create mood and the illusion of space. Decorating windows is a very specific art and one that doesn’t have to cost that much, especially if you decide to install them yourself.

Today there are many options for shades and blinds, which were once considered unglamorous and useless. For larger windows, a light and airy look can be created by the use of vertical fabric blinds, which can be easily rotated for privacy. Venetian blinds can be opened at various angles to allow light in. Mini blinds are inexpensive and come in a wide variety of colors. They are especially appealing for children’s rooms and other places where a casual look is called for.

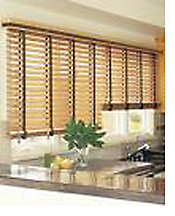
Wooden blinds and their wider slats have a more sophisticated appeal. When combined with a valance, the top of the blind and its hardware remain hidden, rendering a clean natural look. Shades can be made to complement any décor and there are many designs to choose from. One of the most popular is the balloon shade, which is designed in billows and folds.

Whatever your choice, if you are going to install the shades or blinds in your home, the most important factor concerns the accurate measurement of the window in question. Use a steel tape measure and avoid those cloth ones. Shades may be installed with inside mounts, which are surprisingly found inside the window frame or outside mounts, which cover the window.

Have faith. You can do it!

+1
Tweet
Share
Share
Pin
Shares 0

Build An Outdoor Shed

by Kathy Helbig Leave a Comment

Shed_2
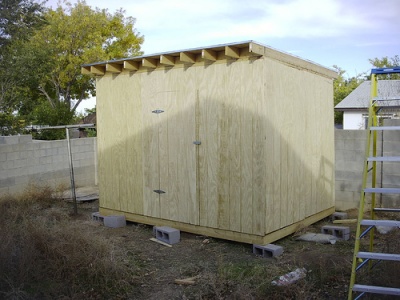
Timothy, at Charles and Hudson has led us to a very simple way to construct an outdoor shed. Evidently, wikihow has all the instructions you will need to build yourself a very nice shed, along with a list to take to your local hardware store and lumber yard for materials.

You might even incorporate the corrugated fiberglass roof mentioned for added natural light. And if you’re real handy you might even throw in a window or two.

+1
Tweet
Share
Share
Pin
Shares 0
« Previous Page
Next Page »

Subscribe to the Shak

Copyright © 2023 · Shak Media · All Rights Reserved