Shakadoo

Everything to do with your shak.

  • Home
  • About Us
  • Advertise
  • Contact Us
  • Press
  • Privacy Policy
You are here: Home / Archives for Tamiko Willie

Light switch extenders

by Tamiko Willie Leave a Comment

Light_switch_extenderSometimes home repair isn’t putting a new addition on your suddenly too-small house; it can be as simple as making your household more accessible for the people you love.

Light switch extenders are perfect for giving your toddler the ability to practice their independence and those all-important "big kid" skills. Mastery of darkness can be a huge boost to your little one’s confidence.

And the usefulness of a switch extender doesn’t stop at the pre-K demographic…older kids with short stature and family members who use wheelchairs will also find extenders profoundly useful. They might not, however, want to use moon-shaped devices.

In that case, you’re in luck, because there’s a variety of styles out there to choose from, including a clear plastic one here and a simple wand shaped one here.

If you’re particularly handy, you can even cobble one up yourself using a wooden dowel and some electrical shrink tubing, both of which you can find at your nearest True Value or other local hardware store. You can also use one of those plastic rods that control the slats of any standard mini-blind unit. All you have to do is find shrink tubing that’s just big enough to fit over both your rod and the light switch. Fit the two pieces together and then apply heat with a hair dryer until the tubing is tight and the rod secure. Easy as pie. A complete home improvement project, done and finished in under two minutes–doesn’t get better than that.
+1
Tweet
Share
Share
Pin
Shares 0

Save some energy, and some money

by Tamiko Willie Leave a Comment

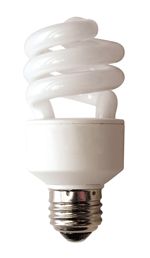
Home Depot is having an Earth Day Celebration! On Sunday, April 22,  they will be giving away 1,000,000 compact fluorescent light bulbs to customers who visit their stores.

Cflbulb

The offer is valid in the continental US, while supplies last.

+1
Tweet
Share
Share
Pin
Shares 0

Killing ugly and non-functional with one stone

by Tamiko Willie Leave a Comment

We’ve mentioned our 2 part list previously, divided into the ugly and non-functioning. Our first big home improvement project knocked items off of both columns.

The garbage disposal quit working exactly 5 minutes after we bought the house; it was almost entirely  clogged with a disgusting grease-like substance and the atrocious pink-with-gold-sparkles-and-aluminum-trim countertop that surrounded it is best left unmentioned. Forever. Our goal was to arrive at a relatively inexpensive, temporary solution until we could remodel the kitchen at a later date. Here’s how it went:

We walked into Ye Olde Home Depot and promptly lost our minds to all the possibilities. Just kidding…in actuality, we lost all our green stuff, but it was for a worthy cause and if we’d gone elsewhere, we probably would have lost a heck of a lot more. At the end of several exhausting hours in the store, the tally stood like this:

  • Garbage disposal: $60.00
  • Sink to replace the broken pink one: $80.00
  • Affordable faux-marble DIY countertop: $80.00
  • Iron on end plates for the gloriously unpink countertop: $20.00
  • Sink drain trap: $9.00
  • Miscellaneous plastic drain pipes: $10.00
  • Faucet, well…we started out at $80.00, but that figure somehow morphed into $225.00
  • $300.00 housewarming Home Depot gift card from the in-laws: priceless

We got home in the late afternoon with our purchases and, in a fit of boundless enthusiasm, decided to start exorcizing the pink right away. After, disconnecting the plumbing, unplugging the disposal, and attempting to lift the countertop off, we discovered that this thing was seriously heavy.

Countertops, we learned, are barely attached to the cabinets. Whoever
installed that monstrosity of a counter used about a dozen angle
brackets with only 2 screws in each, mostly relying on the 300 pound
cast iron sink to keep the whole, hideous mess from flying away. They
should have let it’s nauseating pinkness escaped the bonds of gravity. In the end, we had to get out the Sawzall and carefully cut the ends off the counter just to get the sink to move.

Of course, after that, the heady adrenaline rush of starting a project began to wear off and we promptly collapsed into that near-catatonic state known as Home Improvement Project Overload. Fortunately, we’d been throughly coached on what to do, should the dread event come to pass; we shelved it for the evening. Tune in tomorrow to find out how we survived…

+1
Tweet
Share
Share
Pin
Shares 0

It’s time!

by Tamiko Willie Leave a Comment

If you’re like me, you probably haven’t tested your smoke alarms since you moved in.
The U.S. Consumer Product Safety Commission recommends that you test them every month, and replace the batteries annually. They suggest that you establish a routine for replacement, a good time is every spring or fall when you set the clocks for daylight savings time.
Smoke detector location is very important, you should have at least one on every level of the house, and one in every bedroom is a good idea too.Smoke_alarm
When installing new units, the should be within 12" of the ceiling.

Studies have shown that children often sleep right through smoke alarms, but you already figured that out because you know that they sleep right through their alarm clock shrieking at them when it’s time to get up in the morning.

That said, you should have them installed in your bedroom, if you have to choose.

I’m going to go put new batteries in my alarms now.

This is a home improvement project I can handle.

+1
Tweet
Share
Share
Pin
Shares 0

On a clutter diet

by Tamiko Willie 2 Comments

We had friends come over recently, one of whom happens to have an 18 month old attached to her. He was a charming and inquisitive little bugger and our 10 year old son was more than happy to pull out all his old toys that don’t get much face time, now that he’s practically all grown up.

Out came the Hot Wheels cars and about 150 feet of track; various and sundry picture books (mainly featuring anything to do with cars, trucks, or construction equipment); and a bunch of really cool building block toys. Over the course of the afternoon, our boy passed down crucial, secret boy information, like how to make cars go reallyreally fast and the best way to build a Bristle Block car. When it was time to go, he decided to send some of those toys home with his new friend. It’s a good thing, too, because frankly, it’s getting hard to find places to stash all his toys.

None of which seems to have anything to do with home improvement-type stuff, except that when I watched that box of toys walk out the door, it occurred to me that it’s high time we indulged in a little spring cleaning clutter reduction.

Like as not, you’ve felt the itch, too–so here’s a round up of some of our favorite sites that help you trim down and tame the clutter:

  • FlyLady: Ok, it’s kind of a weird name, but she’s really got a handle on what it takes to streamline your household. Sometimes the hardest part is figuring out how to start…she’ll help you take that first step.
  • Declutter It!: They’ve got a little bit of everything and not surprisingly, you can actually find it.
  • HGTV: It’s hard to go wrong with these guys.
  • About: Housekeeping: About is always a good repository for answers to your questions.
  • Ikea: So many great organizational aids and you can totally afford them!
  • The Container Store: Has everything you could possibly need to keep your home shipshape.
+1
Tweet
Share
Share
Pin
Shares 0

Best darn saw ever

by Tamiko Willie Leave a Comment

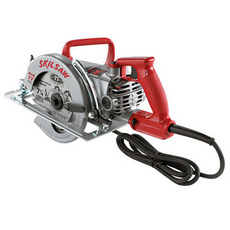
I love this saw.Saw_2

This is a Skil Magnesium Wormdrive Circular Saw. They’re available in 2 flavors; magnesium and regular. I prefer the magnesium for it’s two pound weight savings over the standard saw. Really makes a difference when you’re trying to wrangle it over your latest project.

Due to its long plate, it has a tendency to cut nice and straight,how much do you love that? And the blade is on the same side as your eyes, so that you can see your cut, as you make it. Last but not least, it has tons of power–it never bogs down, no matter what you throw at it.

At Home Depot, the Mag sells for $179.00 and you can get a regular version for $159.00, but we got ours on ebay, slightly used for $75.00 plus $15.00 shipping. The price tag was still on the handle and it wasn’t even dirty.

These saws have been the industry standard since right around forever and they deserve their reputation 100%. They have oil that needs changing from time to time. I can’t tell you how happy it makes me to know that Skil thought their saws would live long enough to need changeable oil. Three cheers for excellent design.

So walk around the house and find yourself a home improvement project that will justify the purchase of one of these saws; you’ll never regret it. In fact, you might very well be justified in whipping up a little glass-topped display case for your new saw. I’d recommend putting it right in the front entryway. This saw makes you happy every time you see it.

+1
Tweet
Share
Share
Pin
Shares 0

Save some REAL money

by Tamiko Willie Leave a Comment

We’ve touched upon some of the ugly aspect of parts of our home when we first purchased it, but we haven’t explored the very ugliest part yet–our kitchen.

The floor was bargain basement linoleum, the counter was pink with gold sparkles and gold stars, (really)
And the appliances were almost as bad. The lovely brown stove next to a harvest gold refrigerator that coordinated beautifully with the pink sink that featured a rusty, broken corner. OMG! We’re talking gouge-out-your-eyes ugly.

We actually had enough self control to wait a few weeks before doing any appliance shopping, believe it or not. We browsed a couple of times, but were turned off by the aggressive salespeople for a while. At one national department store we were descended upon by so many salespeople it was like mosquitoes at a campout. At a nationwide chain-type electronics store that also sells appliances, we were greeted by a pimply high-school kid who knew less about appliances than we did, but he sure was eager to sell us an extended warranty!

Eventually, we ended up at our locally owned, high-end (read- expensive) appliance store, Idler’s. We nearly ran screaming from the store when we caught sight of the $10,000 oven/ cooktop combos in the front windows, but as we looked around, we realized that their prices on the stuff in our price range really were pretty fair.

Back in the left rear corner we noticed a hallway that a couple of salesperson/customer groups had slipped into and then sneaked out of. I asked our salesman what they were hiding back there. Turns out it was their damaged items area. Now we’re talking!

We looked and looked, and actually found some things that were interesting and workable. For instance, there was a nice big, side-by-side refrigerator in black. The freezer door had a good sized dent in it, however. We asked about a replacement panel but the manufacturer only sold complete doors for about $700.00 each, making it more expensive than an undamaged refrigerator.

My ever-thinking spouse had a solution though, "What if we glued a cork bulletin board over the dent, you know, for our boy’s drawings and things?" What a great idea! Cha-ching! $1450.00 refrigerator with a full warranty- $700.00! Done deal.

The next thing we found was the dishwasher. Almost top of the line, black, with every feature imaginable, but there was a tiny scratch in the plastic controls console and a small white smudge
on the bottom corner. I could live with the tiny scratch, you really had to look hard to see it, and I knew the smudge would polish off. Cha-ching! $850.00 dishwasher with a full warranty- $300.00! Done deal.

Next was the stove. We looked and looked, but we couldn’t find anything in the super- secret damaged- goods back room that suited our needs. We really needed a freestanding stove, not a cooktop and separate oven. Black and/or stainless, with a solid grill on top, not four individual grills, and a convection oven. With the help of our knowledgeable, and decidedly unpushy salesman, we found just the one.

Everything we asked for, in stainless and black. $1500.00. Hyperventilate. We’d bought actual working cars for that amount.

Certainly not a deal like the blemished room, so I asked about a discount. At first he said that he really couldn’t mark it down at all, it was a brand new model, blaah blaah, so we pressured him for awhile until finally he agreed to talk to the boss.

Returning with a smile, he says "The boss says it’s cool if I knock off $200.00. I told him you guys were buying a lot of stuff and that you were really nice." Very small cha-ching. $1500.00 stove, $1300.00. But a cha-ching nonetheless.

All in all, a great shopping experience. Our salesman had been selling appliances for 9 years and he knew everything about them. He never pressured us at all, offered extended warranties but recommended that we not buy it for the stove because he said that, "nothing ever fails on that one and their parts are cheap anyway."

So while you’re window shopping at your local appliance store, don’t forget to check out the blemished goods section. You might get lucky and score like we did–there’s nothing like a great deal to stretch those home improvement dollars.

+1
Tweet
Share
Share
Pin
Shares 0

Unstick what’s stuck

by Tamiko Willie Leave a Comment

Inevitably, as you take on home improvement projects, you’ll be challenged with stuck, rusted fasteners. Luckily, there are ways to approach these problems with less frustration and a greater chance of success.

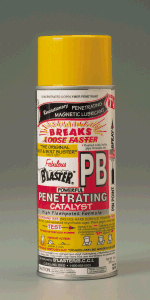
PB Blaster is your greatest friend and ally. Pbcatalyst
It’s available at most hardware or auto parts stores and leads the pack when compared to similar products. This stuff is for metal fasteners that are screwed into or onto metal. That’s good, because that’s where you’ll have the worst problems.

First, be sure to clean up the portion of the bolt or screw that the tool will engage–you want to maximize your gripping surface any way you can. Take a wire brush to rusty nuts and scrape paint or dirt out of a screw head.

I have 3 simple rules when it comes to stuck fasteners–Juice, heat, and impact. That’s my mantra. Know it. Use it. Live it.

You can’t always use all three, for instance you can’t crank up a propane torch and heat a gas fitting until it glows; you’ll blow yourself up and your fitting will still be stuck. Also, I’d rather not see you spray PB Blaster all over your beautiful wood door, but sometimes you’ve gotta do what you’ve gotta do.

Back to the mantra. Juice means, to soak the junction with penetrant and let it soak in for a few minutes. Heat means, to get the problem area as warm as you can, without causing any fires, explosions, or critical damage to your flippers or other valuables. It’s best to warm up the female side of the connection, so it expands away from the threads. Impact means, don’t use a torquing motion (turning motion) to try to loosen a bolt, but rather hit your tool in the correct direction to unscrew it, either with your palm or a hammer. It also helps to tap a bolt head square on the top several times with a hammer or tap a screwdriver into the slot with the hammer.

All of these steps help break up corrosion on the threads, without twisting the head off of the screw; the juice gets in between the 2 parts, the heat causes expansion and contraction which also loosens the corrosion, and the impact physically breaks the corrosion apart.

It may take several tries, but with practice, you’ll find that problem fasteners aren’t such a problem anymore.

+1
Tweet
Share
Share
Pin
Shares 0

Lighting doesn’t always cost a fortune

by Tamiko Willie Leave a Comment

When we bought our house, we bought the location more than the house. The house needed everything.
It’s hard to narrow down where to start when the list includes the roof, the flooring, and everything in between. We found it was helpful to split it up between the ugly and the non-functioning.

One of the first ugly projects we took on was lighting. Every fixture in the house was awful. The best of them looked like an antiqued kerosene lantern monstrosity that had most assuredly been rejected by a keen-eyed Spaghetti Western set designer and the rest of them were the kinds of things that you’d see left over in the free pile at a garage sale.

Shopping for lighting can be a daunting process, especially right after you’ve closed escrow…too many choices and not nearly enough money, but we had to feng-shui some of the ugly out of there and soon. Fortunately we found a great (temporary) solution at Costco. On our way to the Giant Muffin sector, we saw a huge pallet stacked high with fluorescent ceiling fixtures that, while we didn’t absolutely love them, at least they were better than half of what we’d seen at some other stores and they bore only a passing resemblance to anything from the Star Trek set–certainly a step up from where we’d started.

Plus, if we acted now, each gleaming, non-fugly fixture was only $8.50 each! At that price we were practically making money on the deal; the bulbs alone were worth $5 something! I thought we needed six of them; naturally, my better half thought the correct number was more like seven– so we bought eight and it was still less money than the one light that we really did like.

We blasted home like we’d just won the lottery and installed six out of the seven in about an hour and a half. We only got shocked once, each.

So the moral of the story today kids, is even if you don’t absolutely love it, it’s OK to make a temporary improvement. As long as it’s a real bargain.

+1
Tweet
Share
Share
Pin
Shares 0

Spring clean up

by Tamiko Willie Leave a Comment

After completing a home improvement project, you may be left with something you never, ever wanted. It could be that you’re now stuck with a dead water heater or maybe an unwanted, unsightly old refrigerator and no truck to haul it away with.

In many areas around the country, the garbage collection company holds an annual spring clean up event.
This week, in my area, the garbage company will collect the equivalent of 12 trash cans of extra refuse for free.

They will also take away any large items, such as a refrigerator, stove, or water heater for a $10.00 charge–that’s a pretty good deal, if you ask me. Check with your local waste collector to see if they offer a a similar service. If not, you may be able to organize a little publicity about the problem of illegal dumping in your area; depending on where you live, you might just find your local politicians are better connected than you think when it comes to illegal dumping.

+1
Tweet
Share
Share
Pin
Shares 0
Next Page »

Subscribe to the Shak

Copyright © 2023 · Shak Media · All Rights Reserved