Shakadoo

Everything to do with your shak.

  • Home
  • About Us
  • Advertise
  • Contact Us
  • Press
  • Privacy Policy
You are here: Home / Archives for How-To

Painting? Get the right amount!

by David Allen Leave a Comment

When you are out looking at paint for your decorating you need to be sure that you have enough, because there is nothing worse than running out of paint when you only have a little amount to do to finish the whole job, and what would happen if you were unable to get to the store or if they had run out of that shade?
Paint2_000

The best thing to do is make sure that the walls that you are painting are measured correctly and this will enable you to the right amount.

So how do you work out how much paint to buy?

Simple all that is required is a paint calculator, these are available for free on many paint manufacturers websites and best of all they are just plain easy to use.

For example:

You take the four measurements of the walls, the length and width of the ceiling, and finally how high the ceiling is, and that is it, the calculator will work it out for you.

Naturally there are doors and windows, but this will mean that some will be left over and can be used at a later date if there is any touching up to do.

Paint Quality Institute.

Glidden.

Domino Magazine.

True Value Paint.

The above are just an example; they have plenty of tips too.

Happy Decorating.

Source [Charles and Hudson]
+1
Tweet
Share
Share
Pin
Shares 0

What To Do About Smokey Furniture

by Kathy Helbig Leave a Comment

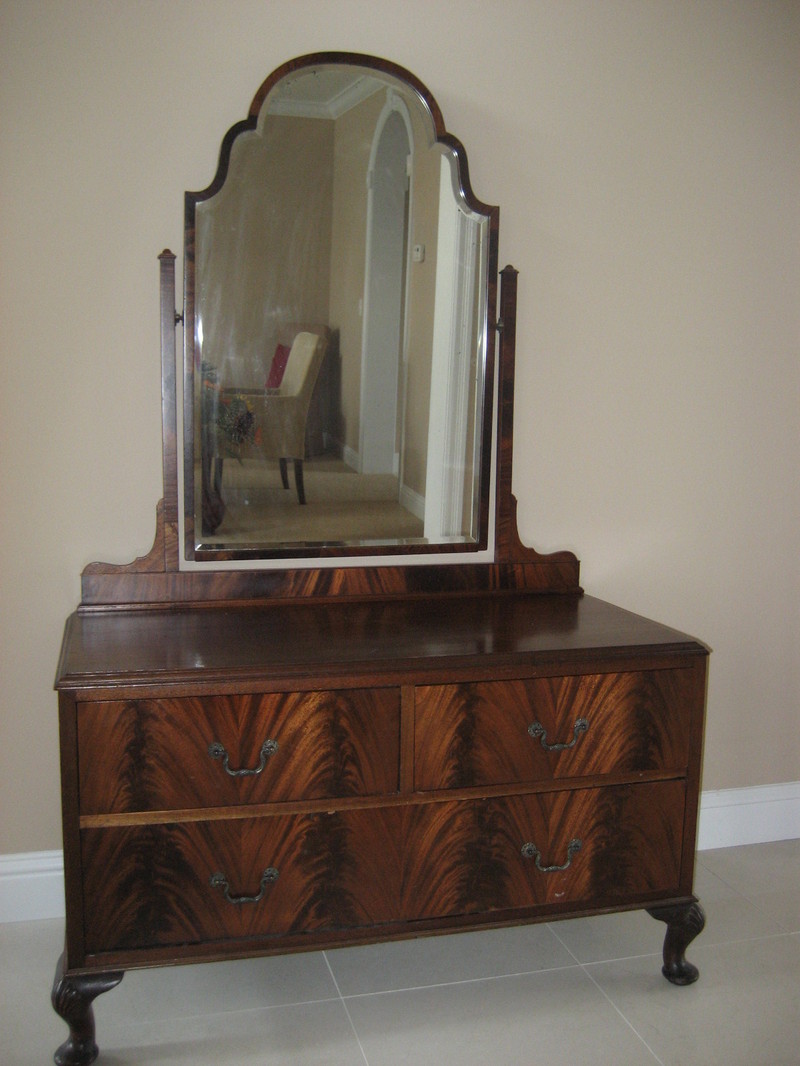
HutchA reader in Oregon sent in a picture of this antique dresser in need of a little airing out.

Evidently, her aunt, whom she inherited it from, was a heavy smoker and no amount of airing, dusting, or wiping seems to be getting rid of the odor.

She wants to know what she can do about this.

This is a tricky situation. If the odor is coming from inside the drawers it can be difficult to get rid of. We recommend trying this:
Fill the drawers with crumpled newspapers, then close them for several days. When you open them, if the papers smell like smoke, stuff the drawers with fresh newspapers and let it sit again for a few days.

If that doesn’t work try using activated charcoal (sold in pet stores where aquariums are sold). Place the uncovered bowls of charcoal in the drawers for several days.

If this still doesn’t work you may have to try lightly sanding the inside of the drawers and then vacuum.

If the odor is coming from other parts of the piece you may want to talk with a professional furniture restorer that can offer suggestions or have the piece professionally redone. 

If you have any suggestions please let us know. 

+1
Tweet
Share
Share
Pin
Shares 0

Rescue Me: Sad Side Table

by Sarah C. 1 Comment

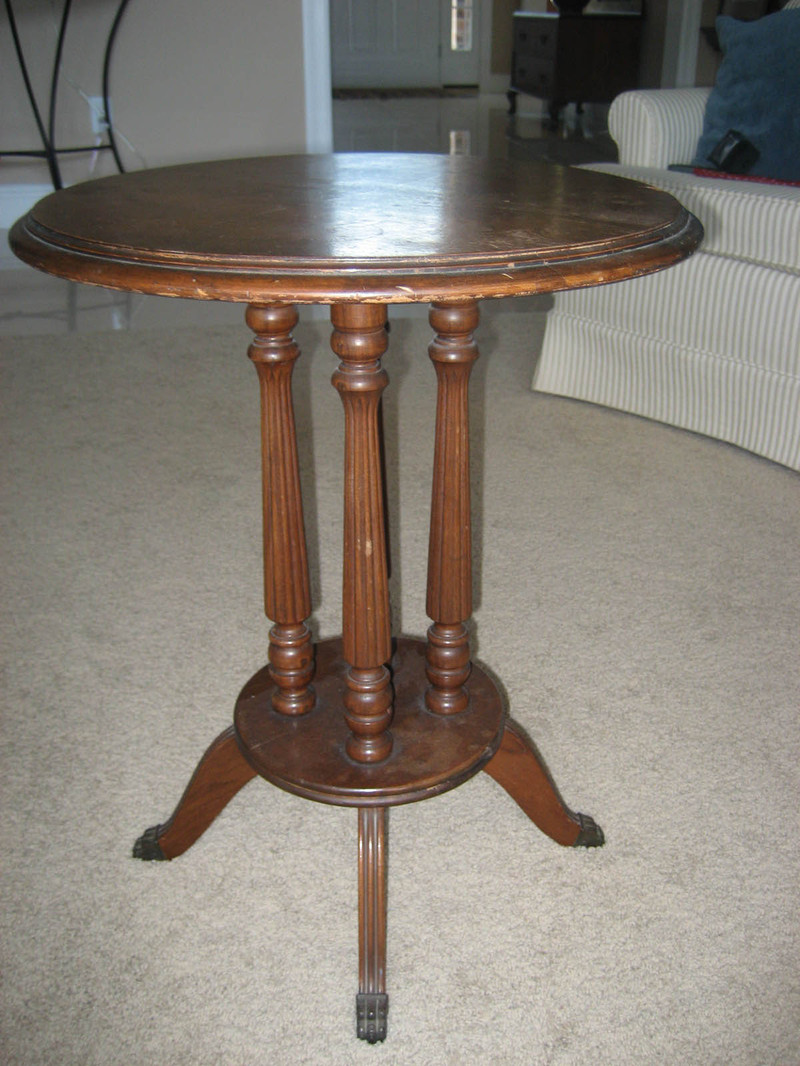
Img_0409_2A reader in MO sent in this photo of an old side table in need of a little TLC. She commented that the shape is nice, but seems outdated.

71552_pe187145_s3
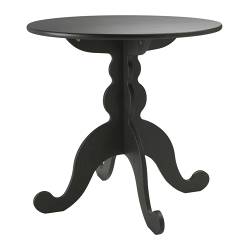
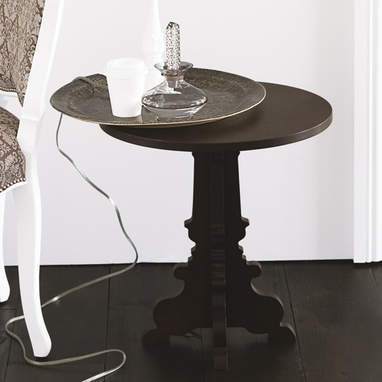
I agree, the shape is cute. And thanks to a little shift away from minimal lines, a table like this can be very in-style with a simple color change. Think this  Hemnes side table from Ikea (right) or this Silhouette side table (below) from Brocade Home.

Bh_prod103257_mnI would paint the table matte black, though you could also go with a high-gloss white.

With the turned legs, removing the finish from this piece completely will be difficult. You might consider having it professionally refinished.  Or, do a light sanding, wipe with a dust cloth, and test a coat of Kilz primer to see if you get any bleed-through from the old stain.

Once you begin painting the black top-coat, use a foam brush to avoid bristle marks. Expect to paint 4 to 6 coats, sanding and dusting between coats to eliminate any bumps or drips.

I recently painted two side tables myself. They required two coats of white primer and 4 coats of the gold color I had chosen.

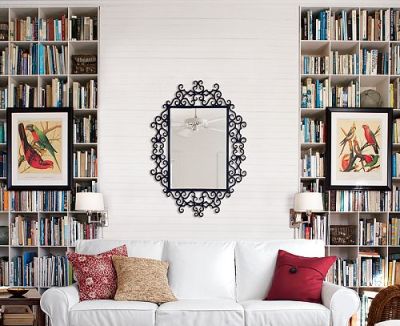
P_a207_pip_st_f06_060707010515_pip_Once the table is painted, add some minimal white accessories, such as these white vases from West Elm ($89 for all three).

+1
Tweet
Share
Share
Pin
Shares 0

Ikea storage units too boring

by David Allen Leave a Comment

Ikea is great, many people experience the pleasure of visiting the local or in some cases not so local store where you can actually spend the whole day, looking at the products and planning out what and where everything you have seen can go, but sometimes, the non finished wood can be somewhat a put off, especially if you have or plan to have it all around your home.
Ikea_2_1

Take the storage units, these a are priced to sell, and many do buy them, but in some cases people paint them or decorate them in some other way, this is what Patty van Dorin from Rambling Rose has done, by simply buying five of the units, bolting them securely tighter to give a tall chest, and as a final finish she has covered it with some vintage wall paper, and boy does it look a dream.

It is amazing how something a simple like a stack of drawers from Ikea can actually be totally transformed by utilizing a few items that you probably have already around the home, like paint and wallpaper, proving what a bit of time and careful planning can achieve.

Ikea has so many products like this that it is almost impossible to choose what item to makeover, however it must said that the wood will need to be treated first otherwise the wallpaper may not stick properly, try sealing first!

Source  [Rambling Rose]

+1
Tweet
Share
Share
Pin
Shares 0

On Apartment Therapy

by Sarah C. Leave a Comment

20070508bookroomA call for DIY tips for hanging art on the front of a bookshelf. It looks great, but how the heck do you get this right? If you know, give AT a shout.

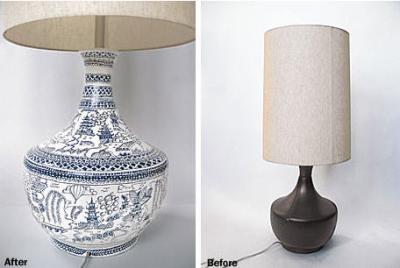
20070509warymeyers_2 This plain Ikea lamp (right) was turned into a Chinoiserie masterpiece with some white paint and a blue paint pen. Wow! Talk about patience. This is part of a series on transforming found furniture from Time Out NY.

+1
Tweet
Share
Share
Pin
Shares 0

What can you do to improve your property?

by David Allen Leave a Comment

Home_improvement
Whether you are planning to move or just want to improve the value of your property, how can you be sure that the work you are planning to do is actually going to improve the value of the property at all?

After all there must be nothing worse than spending an awful lot of money and time on a project only to find that the work done will not add anything to the value of the property and in some cases may even devalue the property price as is the case with some personalized work.

Sound Money Tips has produced a list that gives you the sort of return on your investment you can expect from a few specific jobs, these jobs are not major works, but mainly the sort thing that all homes require from time to time, but by knowing what sort money you are going get back means that you can decide which job is better for you, when time and cost has to be considered.

So exactly what return on your investment can you expect, the list below will give you an idea.

Clean / de-clutter – 973% Average Return on Investment.
Lighten and brighten – 865% Average Return on Investment.
Yard – 426% Average Return on Investment.
Plumbing and electrical – 260% Average Return on Investment.
Staging – 251% Average Return on Investment.
Update kitchen and bath – 168% Average Return on Investment.
Paint interior – 148% Average Return on Investment.
Carpeting = 104% Average Return on Investment.
Flooring – 101% Average Return on Investment.
Paint exterior – 76% Average Return on Investment.

Paint2_000_2
As you can see the higher return is from the tasks that can be done by yourself, with just a bit of expense on materials, but as the jobs involve more skills and materials the return on investment goes down, but as you can clearly see even the last on the list produces a 76% return, which is still good.

Source  [Behind The Walls]

+1
Tweet
Share
Share
Pin
Shares 0

Light switch extenders

by Tamiko Willie Leave a Comment

Light_switch_extenderSometimes home repair isn’t putting a new addition on your suddenly too-small house; it can be as simple as making your household more accessible for the people you love.

Light switch extenders are perfect for giving your toddler the ability to practice their independence and those all-important "big kid" skills. Mastery of darkness can be a huge boost to your little one’s confidence.

And the usefulness of a switch extender doesn’t stop at the pre-K demographic…older kids with short stature and family members who use wheelchairs will also find extenders profoundly useful. They might not, however, want to use moon-shaped devices.

In that case, you’re in luck, because there’s a variety of styles out there to choose from, including a clear plastic one here and a simple wand shaped one here.

If you’re particularly handy, you can even cobble one up yourself using a wooden dowel and some electrical shrink tubing, both of which you can find at your nearest True Value or other local hardware store. You can also use one of those plastic rods that control the slats of any standard mini-blind unit. All you have to do is find shrink tubing that’s just big enough to fit over both your rod and the light switch. Fit the two pieces together and then apply heat with a hair dryer until the tubing is tight and the rod secure. Easy as pie. A complete home improvement project, done and finished in under two minutes–doesn’t get better than that.

+1
Tweet
Share
Share
Pin
Shares 0

DIY Photographic Wallpaper

by Sarah C. Leave a Comment

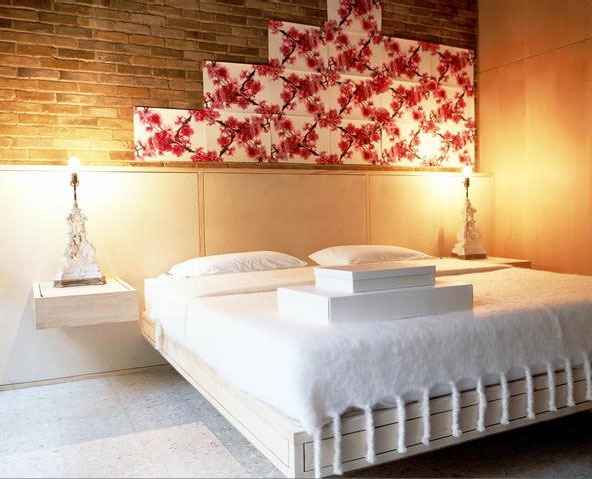
Nfl_08peachHow do you turn an image like this into a stunning wall installation? It’s simpler than you might think. Interior designer John Janik and photographer Michael Horta turned this image of peach blossoms taken in L.A. into wallpaper using photo editing software and a color printer. Here are their tips for trying it at home:

1. Photograph an image you love.

2. Manipulate the image in a good photo-editing program to get the look you want.

3. Print using a quality printer and paper. "We used an Epson 4100
printer and Epson Enhanced Matte Paper for a richer, more velvety
finish," says Horta.

4. Mount with standard wallpaper paste. "You can also frame
individual prints for instant wall art," says Janik, who used the
technique for the dining room of his Dallas home.

WallpaperVia the DMN Shopping Blog.

+1
Tweet
Share
Share
Pin
Shares 0

How To Make Ugly Popcorn Ceilings Beautiful

by Kathy Helbig Leave a Comment

Ceiling_2
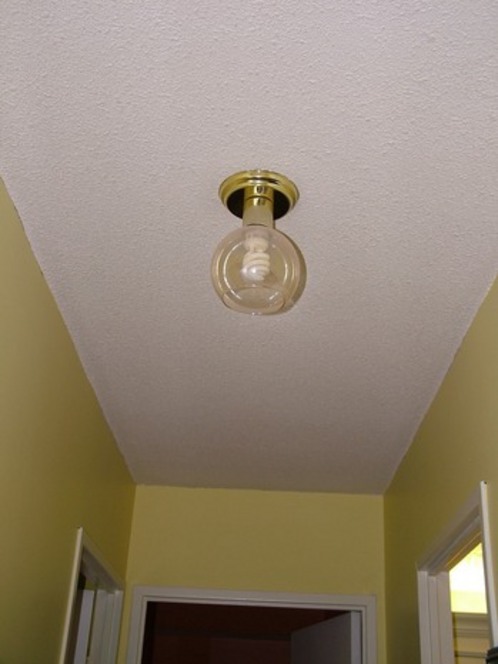
Eric, at Modern Self, found a great post called "How to transform ugly popcorn ceilings into something worth looking at within just a couple of hours." Pretty straightforward.

Evidently, Eric has been dying to make changes to his own popcorn ceilings, but as a renter his hands are tied when it comes to home improvement projects. When he does get his own condo he is going to rip it apart and with all his decor knowledge I’m sure it will be a fabulous project. Until then he will just have to put up with those ugly popcorn ceilings. The neat thing is, you don’t have too and here’s what you can do…..

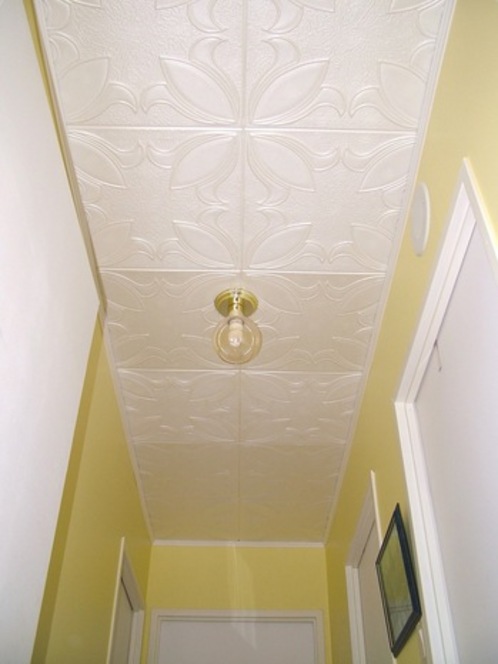
By covering the existing popcorn ceiling with Polystyrene ceiling tiles, you will have a brand new look inCeiling2
about two hours. The tools used for this project were: utility knife, putty knife for adhesive, miter box to cut the crown moldings, measuring tape and pencil.  Very simple. You can leave the tiles white or paint them.  Beautiful!

+1
Tweet
Share
Share
Pin
Shares 0

Killing ugly and non-functional with one stone

by Tamiko Willie Leave a Comment

We’ve mentioned our 2 part list previously, divided into the ugly and non-functioning. Our first big home improvement project knocked items off of both columns.

The garbage disposal quit working exactly 5 minutes after we bought the house; it was almost entirely  clogged with a disgusting grease-like substance and the atrocious pink-with-gold-sparkles-and-aluminum-trim countertop that surrounded it is best left unmentioned. Forever. Our goal was to arrive at a relatively inexpensive, temporary solution until we could remodel the kitchen at a later date. Here’s how it went:

We walked into Ye Olde Home Depot and promptly lost our minds to all the possibilities. Just kidding…in actuality, we lost all our green stuff, but it was for a worthy cause and if we’d gone elsewhere, we probably would have lost a heck of a lot more. At the end of several exhausting hours in the store, the tally stood like this:

  • Garbage disposal: $60.00
  • Sink to replace the broken pink one: $80.00
  • Affordable faux-marble DIY countertop: $80.00
  • Iron on end plates for the gloriously unpink countertop: $20.00
  • Sink drain trap: $9.00
  • Miscellaneous plastic drain pipes: $10.00
  • Faucet, well…we started out at $80.00, but that figure somehow morphed into $225.00
  • $300.00 housewarming Home Depot gift card from the in-laws: priceless

We got home in the late afternoon with our purchases and, in a fit of boundless enthusiasm, decided to start exorcizing the pink right away. After, disconnecting the plumbing, unplugging the disposal, and attempting to lift the countertop off, we discovered that this thing was seriously heavy.

Countertops, we learned, are barely attached to the cabinets. Whoever
installed that monstrosity of a counter used about a dozen angle
brackets with only 2 screws in each, mostly relying on the 300 pound
cast iron sink to keep the whole, hideous mess from flying away. They
should have let it’s nauseating pinkness escaped the bonds of gravity. In the end, we had to get out the Sawzall and carefully cut the ends off the counter just to get the sink to move.

Of course, after that, the heady adrenaline rush of starting a project began to wear off and we promptly collapsed into that near-catatonic state known as Home Improvement Project Overload. Fortunately, we’d been throughly coached on what to do, should the dread event come to pass; we shelved it for the evening. Tune in tomorrow to find out how we survived…

+1
Tweet
Share
Share
Pin
Shares 0
« Previous Page
Next Page »

Subscribe to the Shak

Copyright © 2023 · Shak Media · All Rights Reserved